English ![]()

No.7 Wolong Middle Road, Wolong Economic Park, Zhifu District, Yantai City, Shandong Province

Views: 0 Author: Site Editor Publish Time: 2026-08-26 Origin: Site
Precise needle specifications dictate overall fabric quality, production efficiency, and machine longevity. Operating any knitting equipment without a thorough understanding of needle dimensions and gauge mechanics introduces severe operational risks. A slight mismatch between the needle profile and the machine's cam system leads to dropped stitches, inconsistent fabric tension, and structural defects in the final textile. In high-speed production environments, using incorrect knitting machine needles often results in catastrophic carriage jams, broken latches, and damaged needle beds.
Selecting the correct hardware requires a structured evaluation framework. Operators must balance the fixed machine gauge (GG), yarn weight compatibility, and specific equipment requirements. Whether managing domestic flatbeds or industrial circular systems, understanding the exact physical tolerances of your needles ensures smooth operation. This guide breaks down technical specifications, explains how to match them to your machine type, and outlines maintenance protocols to prevent mechanical failure and protect your equipment investment.
Gauge Dictates Capability: Machine gauge (GG) is fixed by the needle bed's pitch (distance between needles in mm); needle size must strictly align with this pitch to prevent mechanical failure.
Application-Specific Geometry: The profile of a circular knitting machine needle differs fundamentally from flatbed needles, requiring precise matching to the machine's cam system and operating speed.
Yarn Weight Constraints: There is no "one size fits all" equivalent between hand-knitting needles and machine needles; selection must be based on the machine's fixed gauge and the yarn's specific grist and elasticity.
Preventative Maintenance Drives ROI: Routine inspection and replacement of worn or bent needles in computerized systems prevents compounding defects and costly downtime.
Machine knitting operates under rigid mechanical constraints that do not exist in hand knitting. A hand knitter can force a thick yarn onto a thin needle by adjusting their manual tension. Machine knitting removes this manual flexibility. The hardware dictates the capability. The needle bed features fixed slots, and the carriage or cam system passes over these slots at specific angles and speeds. If the needle dimensions deviate by even a fraction of a millimeter, the butt will not engage the cam correctly. This technical baseline requires operators to evaluate needle specifications strictly by physical measurements and OEM part numbers rather than generic size labels.
Understanding the distinction between pitch and gauge prevents critical purchasing errors. Pitch refers to the exact physical distance, measured in millimeters, between the center of one needle and the center of the adjacent needle on the needle bed. This is a hard, unchangeable measurement. If a machine has a 4.5mm pitch, the slots are exactly 4.5mm apart. You can verify this on the shop floor using digital calipers across ten needles and dividing the total distance by ten.
Gauge (GG), however, represents the number of needles per specific unit of measurement. Traditionally, industrial standards measure gauge as the number of needles per 1.5 inches or 1 inch, depending on the machine's country of origin. A 12 GG machine indicates there are 12 needles per inch. The higher the gauge number, the finer the needles and the closer they sit together. You must match the needle thickness strictly to the pitch to ensure the needle moves freely within its slot without excessive friction or lateral play.
Buyers frequently encounter confusion when sourcing replacement parts because different brands use overlapping generic size labels for needles with entirely different physical dimensions. A standard size needle from one manufacturer may feature a slightly taller butt or a longer latch than a standard size needle from another brand. Installing these mismatched needles causes immediate carriage jams.
Ignore generic sizing charts. Rely exclusively on exact pitch measurements and OEM part numbers. Measure the total length of the needle, the height of the butt, and the length of the hook. Cross-reference these physical dimensions with the machine's technical manual before installing new hardware. Using a micrometer to check the thickness of the needle stem ensures it will not bind inside the needle bed slot.
A standard latch needle consists of several critical structural components. The hook catches the new yarn during the stitch formation cycle. The inside diameter of this hook determines the maximum yarn thickness the needle can handle. The latch swings closed to trap the new yarn and allows the old stitch to slide off the needle. The end of the latch, known as the spoon, must seat perfectly over the tip of the hook. If the spoon is misaligned, the yarn will snag.
The latch connects to the needle via a microscopic rivet. This rivet must allow free movement without lateral wobble. The stem provides the structural length, sliding up and down within the needle bed slot. The butt protrudes upward and interacts directly with the carriage or cam system. As the carriage moves across the bed, its internal cams strike the needle butts, forcing the needles up to clear the old stitch and down to pull the new yarn through. Incorrect butt height causes mechanical jams. If the butt is too short, the cam misses it, resulting in dropped stitches. If the butt is too tall, it crashes into the cam plate, breaking the needle and potentially damaging the carriage.
Flatbed knitting machines generally fall into specific gauge categories, each requiring a distinct needle architecture to handle designated yarn weights. Industrial flatbeds often range from 3 GG (very bulky) up to 18 GG (ultra-fine).
Fine Gauge (approx. 3.6mm pitch / 12-14 GG): These machines utilize highly delicate, thin needles. They are engineered specifically for lace weight, cobweb, and light fingering yarns. The hooks are small, and the latches require minimal yarn volume to close properly.
Standard Gauge (4.5mm - 5.0mm pitch / 7-10 GG): Serving as the industry baseline, standard gauge needles handle fingering to sport weight yarns. The stems are robust enough for rapid production while maintaining a fine enough hook for detailed patterning.
Mid-Gauge (6.5mm pitch / 5-6 GG): This bridge category accommodates DK to light worsted yarns. The needles feature wider hooks and thicker stems to manage the increased yarn grist without bending under tension.
Bulky (9.0mm pitch / 3-4 GG): Designed for worsted to chunky yarns, bulky machines require heavily reinforced needle stems and large hooks. The butts are significantly thicker to withstand the high mechanical force required to pull heavy yarns through tight loops.
High-speed, continuous-loop production demands a completely different needle geometry. Circular machines operate continuously in one direction, meaning the needles engage with the cam system at exceptionally high speeds without the directional reversal seen in flatbeds. A circular knitting machine needle requires superior tensile strength to withstand this constant, rapid cam engagement.
The latch mechanics on these needles must be flawless. At high RPMs, centrifugal force and yarn friction test the limits of the latch rivet. If the rivet is too loose, the latch bounces and splits the yarn. If it is too tight, the latch fails to open, causing massive stitch drops across the fabric tube. Circular needles often feature specialized cutouts or modified stems to reduce friction and dissipate heat generated during continuous industrial operation. Double jersey machines utilize both cylinder needles (vertical) and dial needles (horizontal), which must work in perfect synchronization.
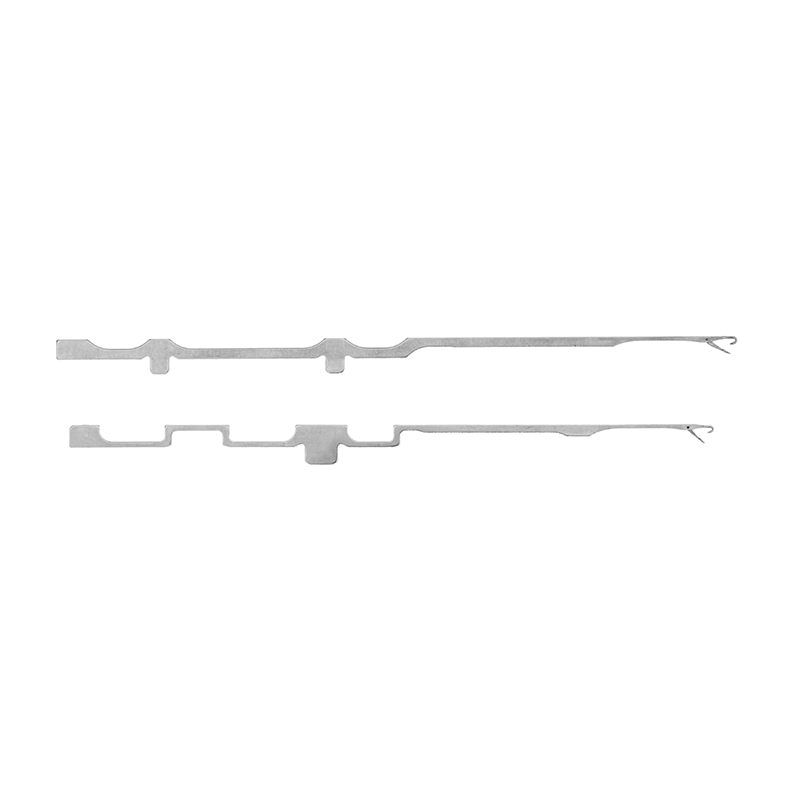
Modern automated systems utilize highly complex needle designs to execute advanced techniques like whole-garment shaping and intricate jacquard. A computerised knitting machine needle often incorporates specialized transfer springs or sliders instead of traditional swinging latches.
These transfer springs allow a needle to pass its stitch to an adjacent needle on the opposite bed automatically. The physical tolerances for these components are microscopic. A bent transfer spring will fail to align with the receiving needle, causing the machine to drop the stitch and trigger an automatic safety stop. Operating computerized systems requires absolute adherence to OEM needle specifications to maintain the integrity of the automated transfer cycles. Compound needles, which use a separate sliding element instead of a swinging latch, are also common in these high-tech machines to reduce the stroke length and increase knitting speed.
A common operational error involves attempting to translate hand-knitting needle sizes directly to machine gauges. Assuming a 4.5mm machine gauge perfectly mimics a US Size 7 (4.5mm) hand-knitting needle will result in severe fabric distortion. In hand knitting, the 4.5mm refers to the diameter of the needle itself, which dictates the size of the loop. In machine knitting, the 4.5mm refers to the pitch (distance between needles). The actual machine needle is much thinner than 4.5mm.
Machine knitting selection must be based on matching the yarn's grist (thickness) to the physical capacity of the needle hook and the spacing of the needle bed. Below is a realistic matrix matching yarn weights to appropriate machine gauges and typical tension dial settings.
Machine Gauge Category | Pitch (mm) | Recommended Yarn Weights | Typical Tension Dial Range |
|---|---|---|---|
Fine Gauge (12-14 GG) | 3.6mm | Cobweb, Lace, 2/30s Acrylic | 3 - 6 |
Standard Gauge (7-10 GG) | 4.5mm - 5.0mm | Fingering, Sock, 4-ply Cotton | 4 - 8 |
Mid-Gauge (5-6 GG) | 6.5mm | DK, Light Worsted, 8-ply | 5 - 9 |
Bulky Gauge (3-4 GG) | 9.0mm | Worsted, Aran, Chunky, 12-ply | 6 - 10 |
When sourcing hardware for industrial production, verifying exact part numbers is non-negotiable. Consider the procurement of a 350A1450 circular knitting needle as a standard case study. This specific alphanumeric code dictates the exact length, butt height, hook diameter, and latch profile required for a specific circular machine brand.
To verify compatibility, operators must consult the machine's technical manual and cross-reference the OEM specifications. Installing a needle that looks similar but has a part number off by a single digit can alter the timing of the stitch formation. The hook might clear the old stitch a fraction of a second too late, leading to yarn splitting or structural weakness in the finished textile. Industrial buyers must measure the butt thickness with micrometers to ensure it matches the cam track width perfectly.
The needle size interacts directly with the machine's stitch dial and tension mast to determine the final fabric density. The tension mast controls how tightly the yarn feeds into the machine, while the stitch dial on the carriage determines how far the needles pull back into the bed. Pulling the needles further back creates larger stitches; pulling them less creates tighter stitches. This combination dictates the exact number of stitches and rows per 10 cm, which is critical for accurate garment sizing.
A hidden variable in achieving this perfect fit is the yarn dye. Expert operators know that different colors of the exact same yarn base will knit to a different gauge. The chemical dyeing process alters the yarn's elasticity and thickness. A heavily dyed black yarn will often feel thicker and less elastic than an undyed natural yarn of the same brand. Consequently, even with the correct needles installed, operators must perform micro-adjustments to the tension dial when switching colors to maintain consistent fabric dimensions. Proper cone conditioning and waxing also play a massive role in how smoothly the yarn passes through the needle hook.
When managing a large facility, the commercial considerations of purchasing replacement needles in bulk require careful analysis. Buyers frequently weigh the initial savings of third-party aftermarket needles against the reliability of OEM parts. While aftermarket needles offer lower upfront acquisition prices, they often introduce significant operational risks.
Aftermarket needles may suffer from inconsistent metallurgy. A softer steel alloy leads to premature latch failure and bent hooks under high-tension knitting. Furthermore, slight deviations in the butt height of aftermarket needles can cause accelerated wear on the machine's cam system. Over time, the cost of replacing damaged cams and the lost production time due to frequent needle jams far outweighs the initial savings. Using non-verified third-party needles immediately voids most manufacturer warranties on commercial equipment. OEM needles undergo strict Rockwell hardness testing to ensure they flex without snapping.
High-speed production environments force operators to evaluate the trade-off between standard steel needles and specialized coated needles. Standard steel needles provide excellent precision and are sufficient for working with soft, natural fibers like merino wool or cotton. However, when processing abrasive yarns like metallic threads, stiff synthetics, or heavily dyed acrylics, standard steel degrades rapidly.
For abrasive applications, titanium nitride (TiN) coated or chrome-plated needles provide superior operational value. These coatings drastically reduce friction between the yarn and the needle hook, preventing microscopic grooves from forming in the metal. While coated needles require a higher initial investment, they extend the maintenance intervals significantly, ensuring continuous production runs without stopping to replace worn hardware.
Protecting your machine investment requires strict adherence to maintenance protocols and the ability to identify failing hardware before it ruins a production run. Needles do not last forever; they are consumable components that degrade with use. Operators must visually and physically inspect the needle bed regularly.
The physical symptoms of failing needles include stiff latches that do not swing freely, bent hooks that snag adjacent needles, worn butts that fail to engage the cam, and microscopic burrs on the metal surface. These physical defects correlate directly to specific fabric symptoms. If any of these fabric symptoms appear, operators must immediately stop the machine and inspect the corresponding needles.
Fabric Defect Symptom | Probable Needle Damage | Required Action |
|---|---|---|
Consistent dropped stitches in one column | Stiff latch or bent latch spoon | Replace the specific needle immediately. |
Vertical lines of uneven tension | Bent hook or twisted needle stem | Inspect and replace the needle; check cam track. |
Fuzzy, split, or frayed yarn in the fabric | Microscopic burrs on the hook or latch | Run a cotton swab over the hook to catch burrs; replace if snagged. |
Loud clicking noise during carriage pass | Worn or chipped needle butt | Stop machine; replace needle to prevent cam damage. |
Establishing a standardized protocol for safely removing and seating new needles prevents accidental damage to the needle bed. In commercial settings, particularly on computerized knitting machines, never replace just one needle after a catastrophic jam. The mechanical force that bent the primary needle almost certainly stressed the adjacent needles. Replace needles in batches. If needle number 50 jams and breaks, replace needles 48 through 52. This batch replacement strategy maintains consistent tension across that section of the bed and prevents secondary failures during the next production cycle.
Follow this strict protocol for replacing needles on a loaded bed:
Disengage the carriage and move it completely clear of the working needle zone.
Using a transfer tool, carefully move the live stitch from the damaged needle to an adjacent needle to secure the fabric.
Ensure the latch of the damaged needle is closed, press down slightly on the hook, and slide the needle forward until the butt clears the retaining bar or spring.
Lift the damaged needle straight out of the slot without twisting.
Inspect the empty slot for lint buildup or broken metal fragments and clean it with compressed air or a fine brush.
Insert the new needle by reversing the removal process, ensuring the butt sits perfectly flush within the track and the latch moves freely.
Transfer the live stitch back onto the new needle and manually knit one row to verify smooth operation before re-engaging the carriage.
Successful machine knitting relies entirely on strict adherence to the machine's fixed gauge and the precise geometry of the needles. Attempting to force incompatible yarn weights or using mismatched needle profiles will inevitably result in mechanical failure and ruined textiles. By understanding the technical specifications of pitch, gauge, and needle anatomy, operators can optimize their equipment for maximum efficiency and fabric quality.
Before purchasing replacement parts, always consult your machine's technical manual to verify exact OEM part numbers. Do not rely on generic size charts or visual estimations. The microscopic tolerances required for smooth cam engagement demand absolute precision in your hardware selection.
To implement these practices immediately, execute the following next steps:
Audit your current needle inventory and discard any needles with stiff latches, bent hooks, or visible wear on the butts.
Conduct a tension swatch test every time you install new needles or change yarn colors to calculate the exact stitches and rows per 10 cm.
Contact verified industrial suppliers to source OEM-compliant needles for your specific machine models.
Establish a routine maintenance schedule to inspect the needle bed and clean lint buildup from the tracks after every major production run.
Implement a batch-replacement policy for any needles involved in a carriage jam to prevent secondary mechanical failures.
A: Machine gauge refers to the fixed physical spacing (pitch) between the needle slots on the machine bed, usually measured in millimeters or needles per inch. Needle size refers to the physical dimensions of the needle itself. The needle size must perfectly match the machine gauge to function.
A: No. Circular knitting machines require needles with completely different geometries, higher tensile strength, and specialized latch mechanics to handle high-speed, continuous-loop production without directional reversal. Flatbed needles will jam and break in a circular system.
A: Replace needles when you observe fabric defects like unexplained dropped stitches, split yarns, or vertical lines of uneven tension. Physically, replace needles if the latches become stiff, the hooks bend, or the butts show visible metal wear.
A: Yes. The chemical dyeing process changes the thickness and elasticity of the yarn. A dark-dyed yarn often knits up tighter and thicker than an undyed yarn of the exact same brand, requiring micro-adjustments to the machine's tension dial.
A: Generally, no. Aftermarket needles often have inconsistent metallurgy and slight dimensional deviations. In computerized machines with microscopic tolerances, these deviations cause automated transfer failures, accelerated cam wear, and frequent production downtime.
A: Latches stick due to a buildup of yarn lint, wax, or machine oil inside the rivet joint. They break from metal fatigue caused by high-speed operation, using yarn that is too thick for the hook, or catastrophic carriage jams.